Sourdough Snowflake Bread Recipe Made with Einkorn Flour
One look at this sourdough snowflake bread and you may hesitate to eat it due to it’s beauty! My goal with this recipe is to not just give you a recipe, but to help boost your confidence. This snowflake pull apart bread tastes like eating the center out of a cinnamon roll! You’ll find it magical the way this bread comes together with just some layering, slicing and twisting. Even my kids gave “Oohs” and “Aws” when it surprisingly went from the form of a circle into a snowflake. They soon began asking if this could be our Christmas Morning treat. It’s both glamorous at gatherings tasty to the core.

Kitchen Tools you will Need
- Parchment Paper to prevent sticking. This recipe uses a lot!
- A Rolling Pin for rolling out your layers
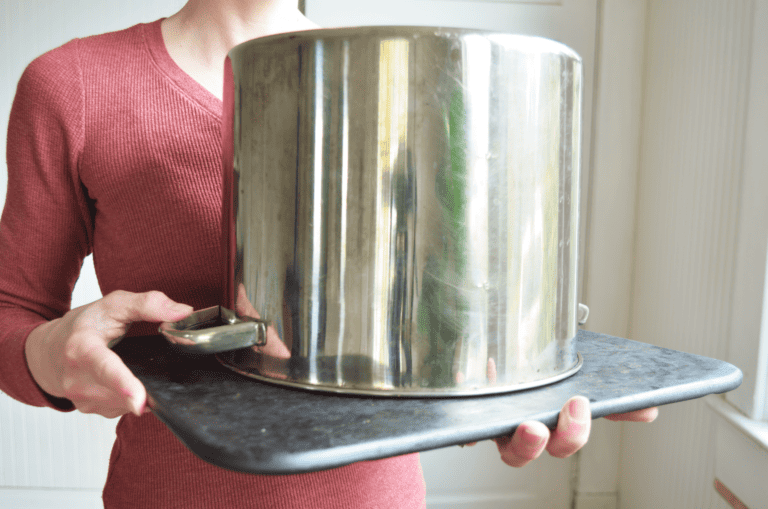
- A Proofing Basket for rising the dough
- A 10 inch pie plate or other circular plate to measure layers
- A large bowl and spoon
About the Ingredients for Snowflake Bread
All Purpose Einkorn Flour
If you haven’t read other einkorn recipes on this blog, let me give you a few of the reasons einkorn is so great. Besides giving our family a flour for everyone to be able to eat, (gluten intolerant or not), it’s packed with huge amounts of nutrition. This nutrition is much more easily digestible.
While modern wheat has a whopping 42 chromosomes, the original wheat from thousands upon thousands of years ago contains just 14. This is part of the reason why it’s so much more easily digested. The downside though, is that it’s also much more dense than modern wheat. The gluten bonds are weak, making it much harder to rise into an airy bread. Even so, it makes a mean sourdough in my opinion and a wonderful snowflake bread. Learn more about it’s benefits HERE. To learn more about how to start baking with this ancient grain check out this post. I get my einkorn grain and flour from Grand Tetons.

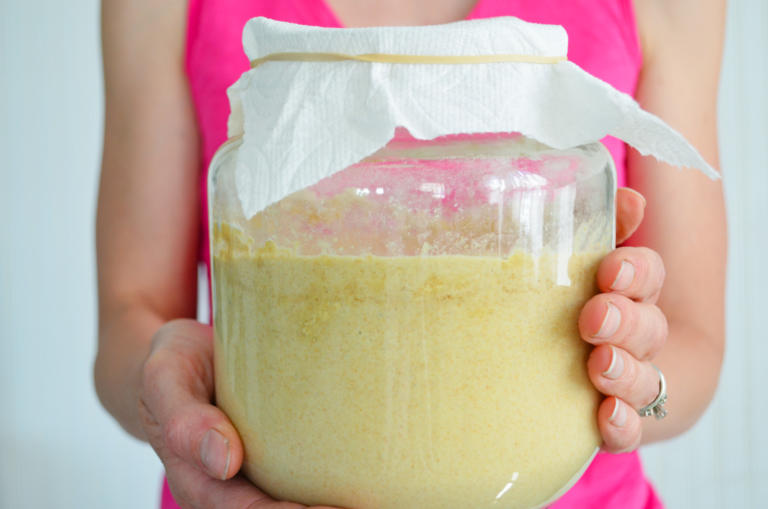
Sourdough Starter
Active sourdough starter is the life of this recipe ( and all sourdough recipes for that matter). I use a 100% einkorn flour starter that you can learn how to make HERE but any sourdough starter will do. Although this recipe uses all-purpose flour, know that I generally feed my sourdough starter with whole grain einkorn flour. This is because whole grain flour carries much more organisms on the bran that sourdough starter needs to thrive. Than, before baking, I’ll sometimes switch over to feeding it all purpose flour if I’m wanting a lighter and less dense rise.

Sugar
For this recipe I use a lighter sugar such as cane for the dough and a dark sugar such as coconut, brown sugar or maple sugar for the filling. Feel free to mix it up according to your needs.
Butter
I use the best butter ever which is butter from grass fed cows! If you’ve ever used grass fed butter, you’ll notice it’s both a deeper color and doesn’t harden up quite like commercial butter. It also has many health benefits. If you’re looking to start eating healthier beyond the “clean 15” I recommend cleaning up your meat and dairy products.
Cinnamon
I’m using Ceylon Cinnamon or “true cinnamon.” Cassia cinnamon is cheaper but also contains a compound called coumarin which can be toxic when taken in larger amounts (such as a 1-2 teaspoons per day according to Healthline). For this reason I decided to invest in Ceylon cinnamon for our extensive holiday baking.
Salt
Salt truly “makes” a good bread in my opinion. It brings out the flavor and sweetness. I either use a true sea salt (make sure it doesn’t have other added ingredients) or a mineral salt. This is rich in minerals that are beneficial for your body.
Ingredients You Need
- 4 1/2 Cups All Purpose Einkorn Flour
- 1 Cup Active Sourdough Starter
- 1 Cup Warm Water (not too hot) plus 2 Tablespoons
- 1/2 teaspoon Salt
- 1/3 Cup Sugar
Streusel Filling Ingredients
- I cup Brown Sugar
- 1/2 Cup Softened Butter
- 2 Tablespoons Cinnamon
- Pinch Salt
The Sourdough Snowflake Bread Recipe

The Night Before
In a large mixing bowl mix together the sourdough starter, warm water, sugar, flour and salt. As it comes into a ball, cover and let sit for 15 minutes to allow the hydration to be absorbed into the bread dough. After 15 minutes, pull the dough out onto a floured surface and fold the dough 5-7 times before rolling into a ball and placing into a floured proofing basket or bowl. Cover with a damp tea towel and let sit to rise overnight or about 8-12 hours. Cooler temperatures generally mean rising will be slower while warm temperature can speed the rising up.
The Next Morning
The next morning, or after about 8-12 hours, take the dough out onto a floured surface and divide into four equal parts with a knife or bench scraper. Cut five 14 inch squares of parchment paper. Mold each quarter of dough into a ball, flour well and roll into a 10 inch circle.

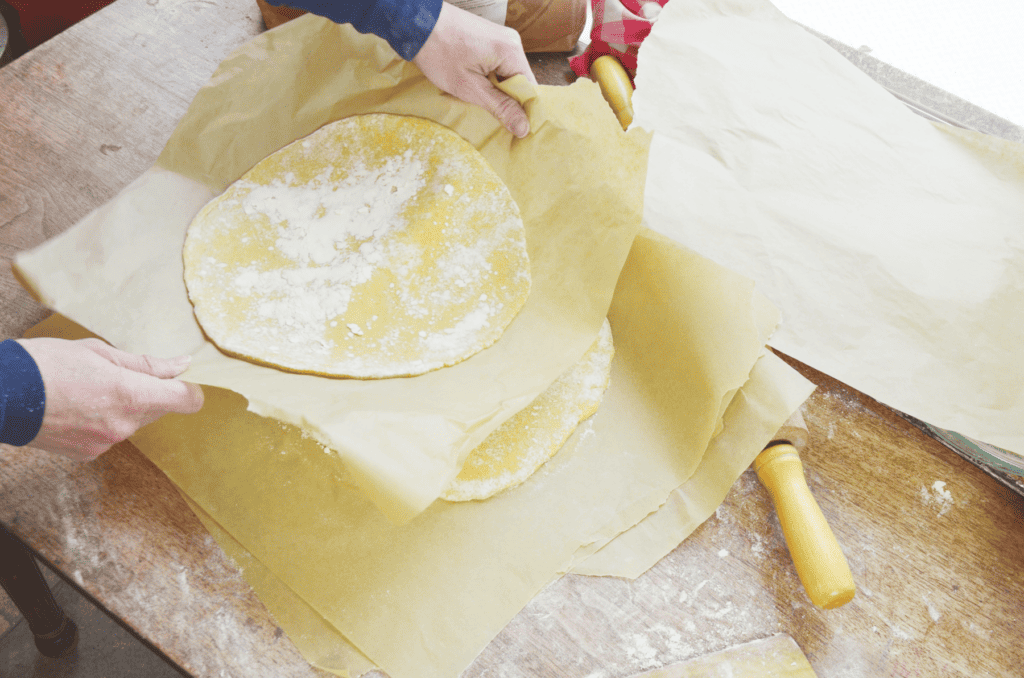
I like to roll out a little larger than 10 inches, then hold a 10 inch pie plate over the top to compare sizes. Using my palm I’ll shape the circle smaller into the correct size. Flour the parchment paper before placing your layer onto the parchment. Then flour the top of the dough circle to prepare for the next layer. Continue making four layers of dough and placing them on well floured parchment, then stacking them. Put one last piece of parchment on the top circle layer then over your stack once again with a damp tea towel. Let sit for 1-2 hours.
NOTE: it’s much easier to spring dough back into a smaller piece than to stretch it to a desired larger size. This is why I roll a little big at first.
Make the Filling
About 30 minutes before attending to your layers of dough, heat the oven to 400 degrees Fahrenheit. Mix together your filling ingredients until creamy. Divide the filling into thirds. After 1-2 hours of rise time has finished, take the tea towel off the stack of dough circles. Take a circle from the stack on parchment paper and spread one third of the filling onto the circle as evenly as possible. Carefully take another dough circle from the stack and lay it on top of the filling topped circle. Spread another third of the filling over this second layer. Do the same thing with the next layer until you’ve spread three layers with filling. Now cover the top with the last dough circle.


To Make a Snowflake

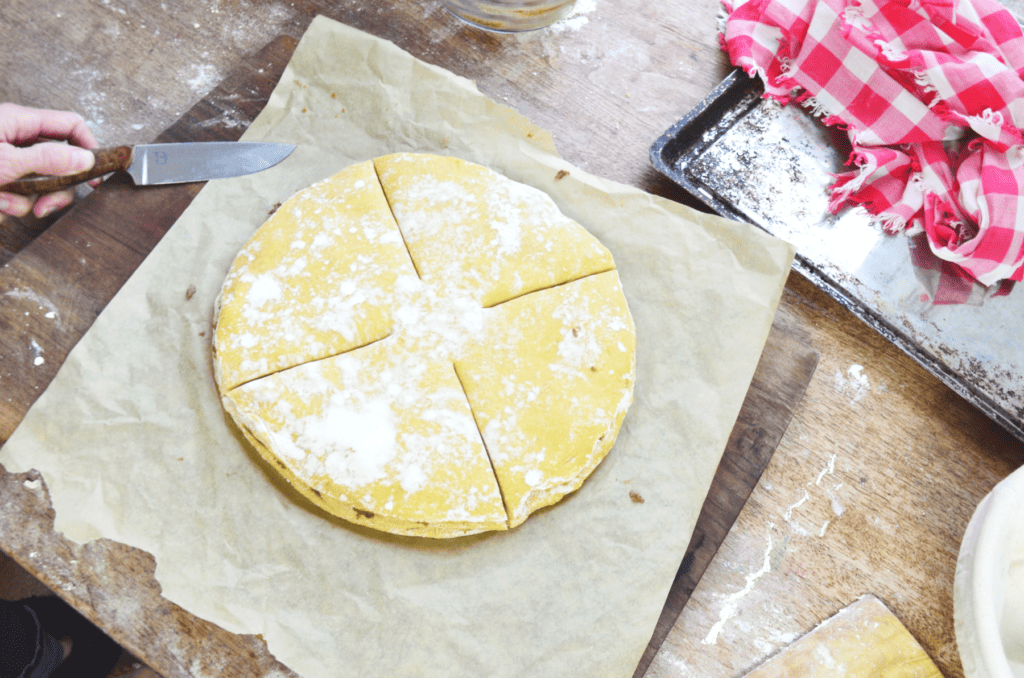
Transfer this stack with the parchment paper to cutting board. Using a cup with a 2 to 3 inch opening, mark the center of the dough by setting the cup upside down. Remove the cup and you should see a light indentation of a circle.
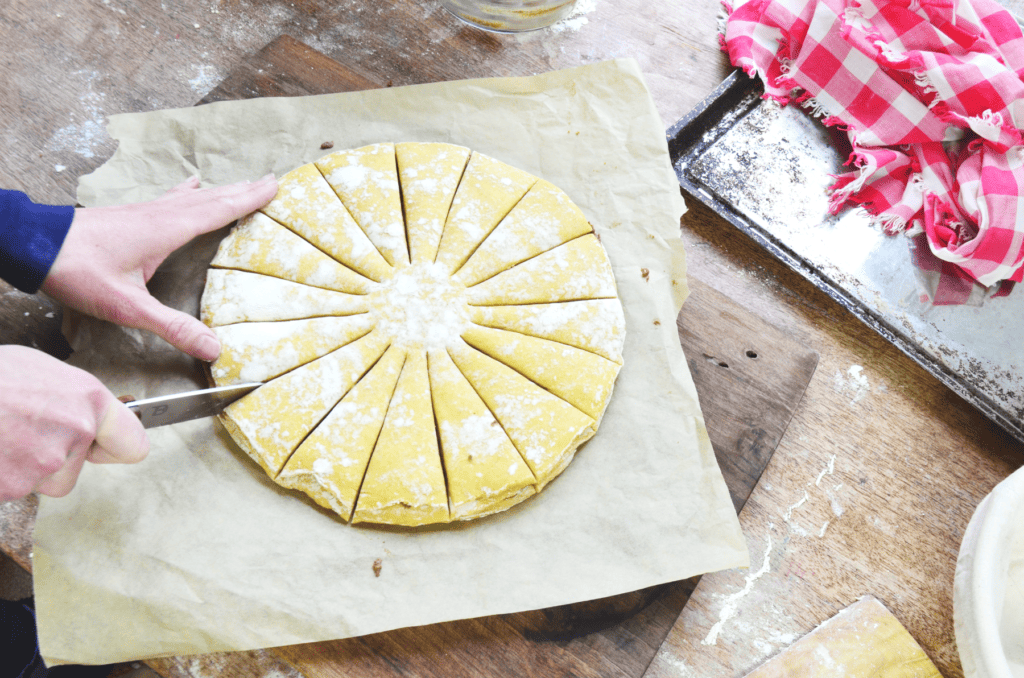
Using a sharp knife, cut the dough into quarters from the outside of the cup’s circle to the edge. Cut the dough into quarters again in between the previous cuts. You should now have eight cuts. Lastly cut in between each of these eight cuts to make 16 equal pieces. Now you’re ready to shape the dough!
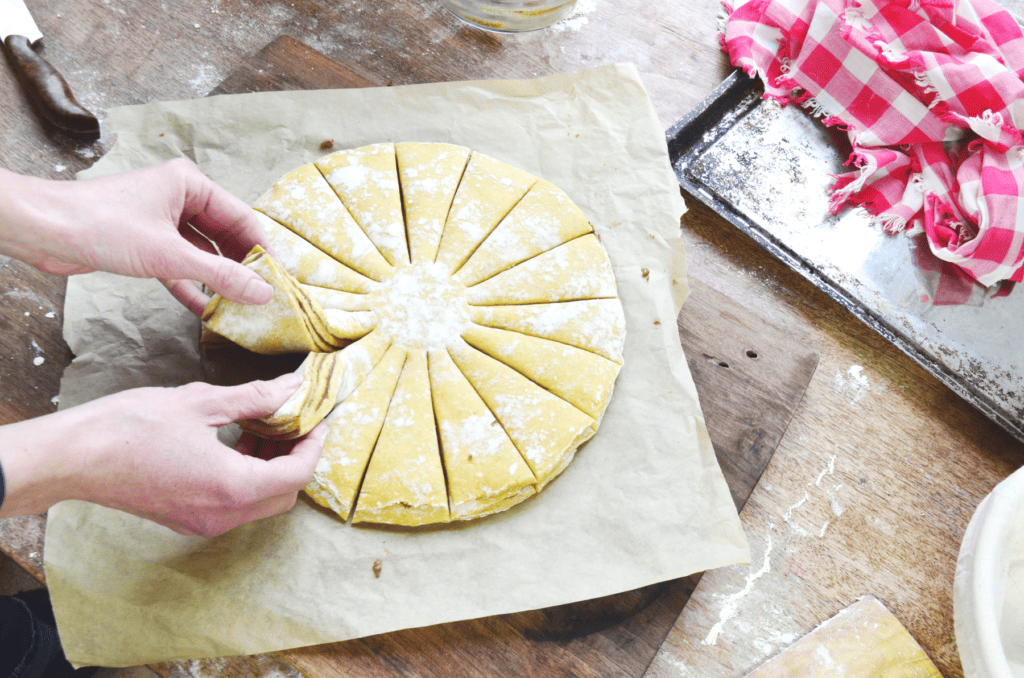
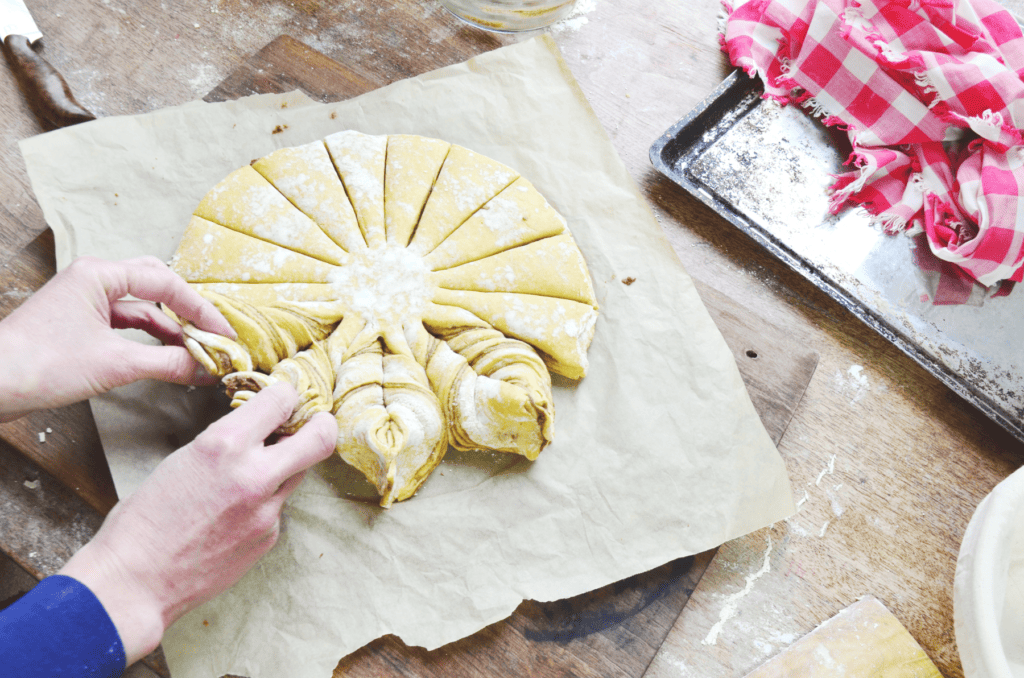
To shape the snowflake, take two pieces next to each other and twist up and out ( away) from each other until they’ve completed two full twists. Pinch the ends together tightly. Do the same with the next two slices. Continue until you’ve twisted all sixteen slices into eight snowflake branches.


Bake it
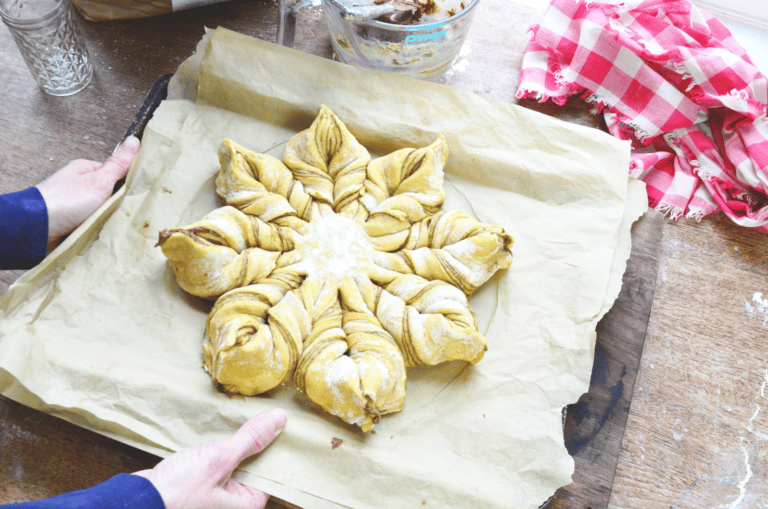
Transfer the Snowflake dough on parchment (you may want an extra piece of parchment incase you cut through the first one) to a baking sheet. Bake uncovered 20-24 minutes until the top just begins to brown.
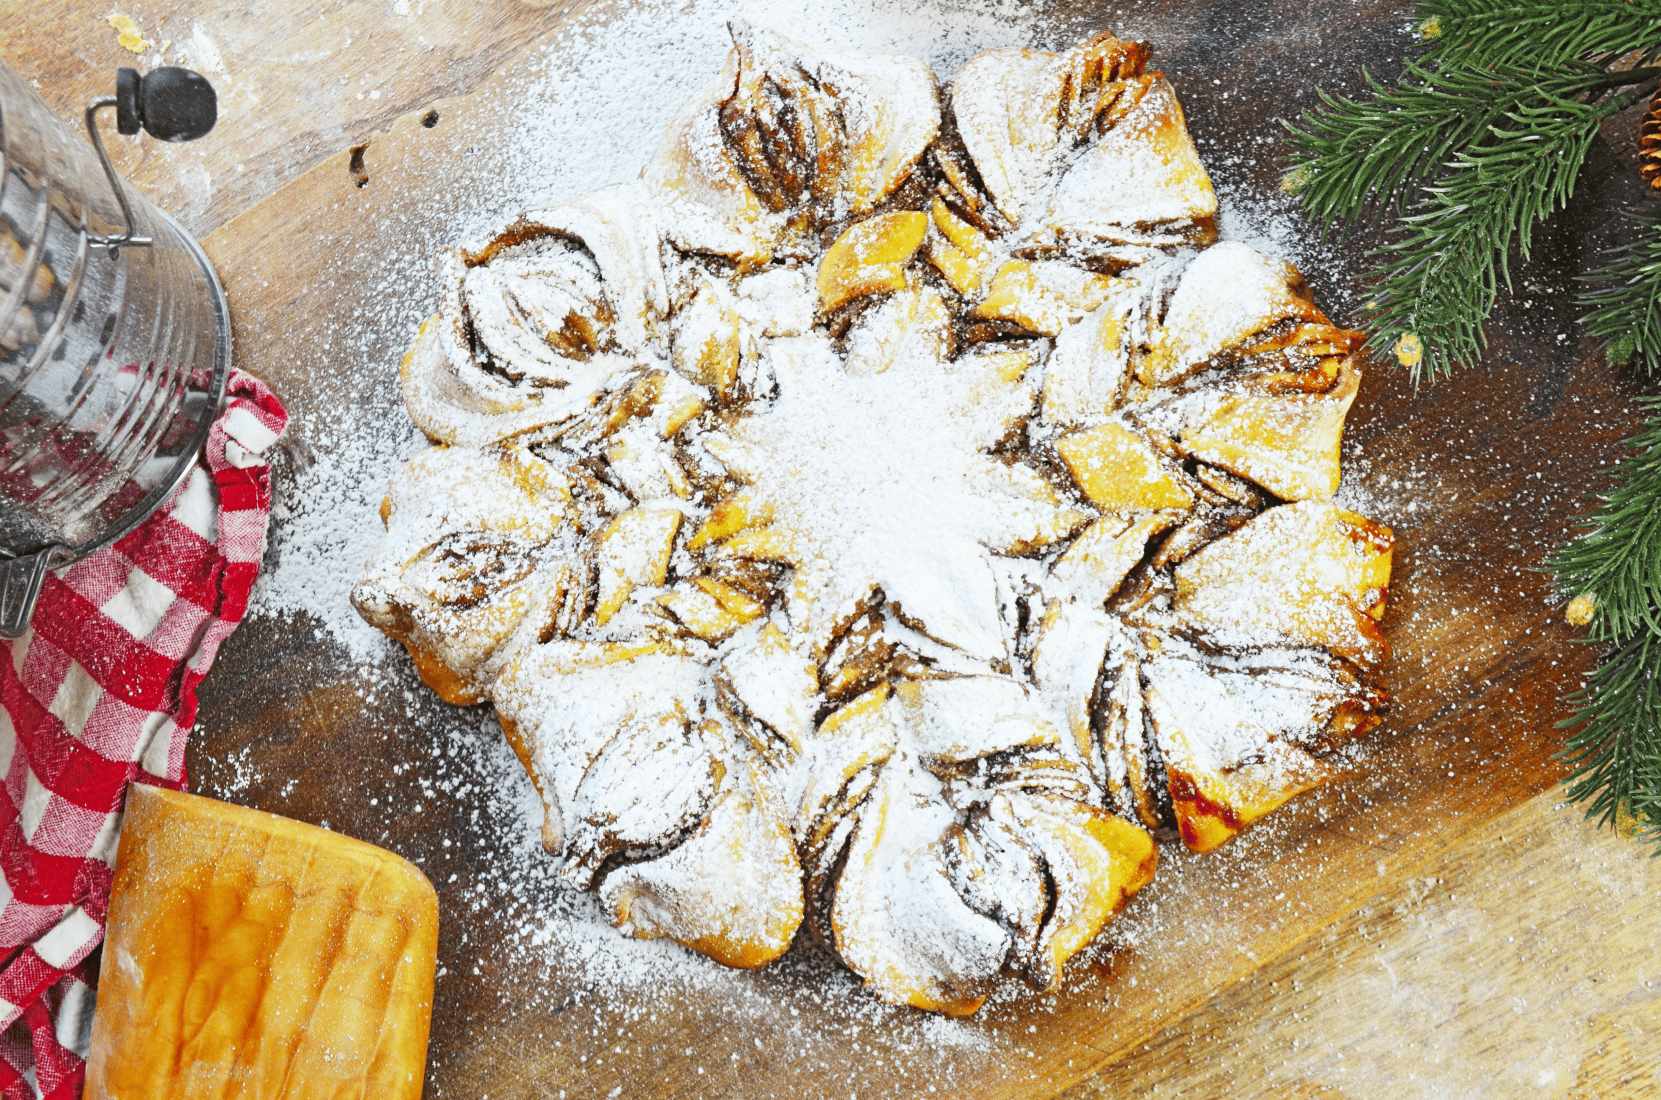
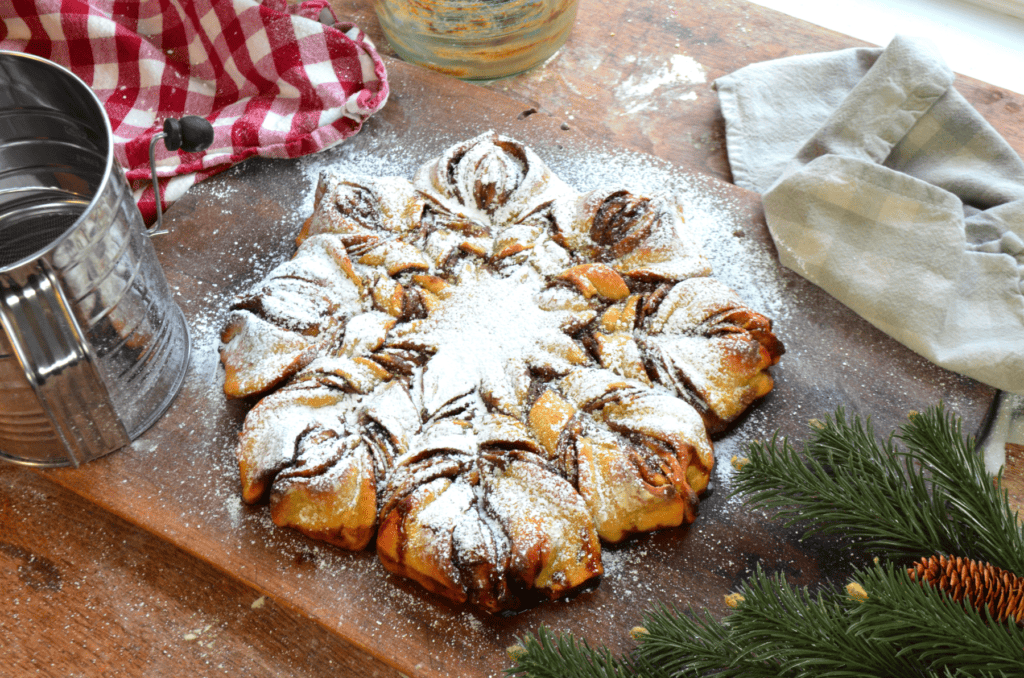
Allow the Snowflake to cool on a pan a few minutes before transferring to a cooling rack. Once it’s cooled for about 15 minutes, you may remove any filling that’s oozed out. Sift Powdered sugar over the top or drizzle with icing. Enjoy!

Sourdough Snowflake Bread

A beautiful artisan snowflake shaped Cinnamon roll bread.
Ingredients
- Dough Ingredients
- 4 1/2 Cups All Purpose Einkorn Flour
- 1 Cup Active Sourdough Starter
- 1 Cup Warm Water (not too hot) plus 2 Tablespoons
- 1/2 teaspoon Salt
- 1/3 Cup Sugar
- Streusel Filling Ingredients
- I cup Brown Sugar
- 1/2 Cup Softened Butter
- 2 Tablespoons Cinnamon
- Pinch Salt
Instructions
- In a large mixing bowl mix together the sourdough starter, warm water, sugar, flour and salt. As it comes into a ball, cover and let sit for 15 minutes to allow the hydration to be absorbed into the bread dough. After 15 minutes, pull the dough out onto a floured surface and fold the dough 5-7 times before rolling into a ball and placing into a floured bowl or proofing basket. Cover with a damp tea towel and let sit to rise overnight or about 8-12 hours.
- The next morning, or after about 8-12 hours, take the dough out onto a floured surface and divide into four equal parts with a knife or bench scraper. Prepare by cutting five 14 inch squares of parchment paper. Mold each quarter of dough into a ball, flour well and roll into a 10 inch circle.
- Flour the parchment paper before placing your layer onto the parchment. Then flour the top of the dough circle to prepare for the next layer. Continue making four layers of dough and placing them on well floured parchment, then stacking them. Put one last piece of parchment on the top circle layer then over your stack once again with a damp tea towel. Let sit for 1-2 hours.
- About 30 minutes before attending to your layers of dough, heat the oven to 400 degrees Fahrenheit. Mix together your filling ingredients until creamy. Divide the filling into thirds. After 1-2 hours of rise time has finished, take the tea towel off the stack of dough circles. Take a circle from the stack on parchment paper and spread one third of the filling onto the circle as evenly as possible. Carefully take another dough circle from the stack and lay it on top of the filling topped circle. Spread another third of the filling over this second layer. Do the same thing with the next layer until you've spread three layers with filling. Now cover the top with the last dough circle.
- Transfer this stack with the parchment paper to cutting board. Using a cup with a 2 to 3 inch opening, mark the center of the dough by setting the cup upside down. Remove the cup and you should see a light indentation of a circle.
- Using a sharp knife, cut the dough into quarters from the outside of the cup's circle to the edge. Cut the dough into quarters again in between the previous cuts. You should now have eight cuts. Lastly, cut in between each of these eight cuts to make 16 equal pieces. Now you're ready to shape the dough!
- To shape the snowflake, take two pieces next to each other and twist up and away from each other until they've completed two full twists. Pinch the ends together tightly. Do the same with the next two slices until you've twisted all sixteen slices into eight snowflake branches.
- Transfer the Snowflake dough on parchment ( you may want an extra piece incase you cut through the first one) to a baking sheet. Bake uncovered 20-24 minutes until the top just begins to brown.
Allow the Snowflake to cool on pan a few minutes before transferring to a cooling rack. Enjoy!
Notes
NOTE: it's much easier to spring dough back into a smaller piece than to stretch it to a desired larger size. This is why I roll a little big at first.
Feel free to use jam or Pesto instead of a cinnamon filling for a different flavor.
Other Options
If you feel creative, try exchanging the streusel filling for a jam or chocolate filling. You could also make this into a savory bread by omitting the sugar and adding some herbs, then fill it with pesto.
The main goal is to have a color shade of filling that is distinct from the bread. This way the twists will be much more recognizable, creating a more appealing dish.

Other Recipes You May Like
From Scratch Sourdough Einkorn Flour Croissant Recipe
Overnight Sourdough Bagels with Einkorn
Whole Wheat Einkorn Sourdough Pizza Dough Recipe
Soft and Chewy Einkorn Gingerbread Cookies in a Hurry
Stay Warm and Enjoy some cozy this Winter! Oh! And let me know how this bread turns out. I’d love to hear.
From the Hilltop,


This recipe did not come out well for me at all. I followed it exactly, except for having a little under a cup of the starter, which I wouldn’t expect to drastically change the flavor of the bread. The dough did rise properly, but it was sooo sticky, getting it off of the floured parchment sheets was a nightmare. It looked good after baking, but the bread was really dry and didn’t taste good, and it could have used a little more filling as well. I’ll go back to my regular cinnamon roll recipe.
I’m so sorry this didn’t work for you. I experienced extremely sticky dough once when making this recipe and found that I needed to flour the dough a lot while rolling out and then before laying on the parchment. The video that goes with this recipe talks a bit about this I think. I hope this helps.